

Information on installing the Vectorworks plug-in can be found here.
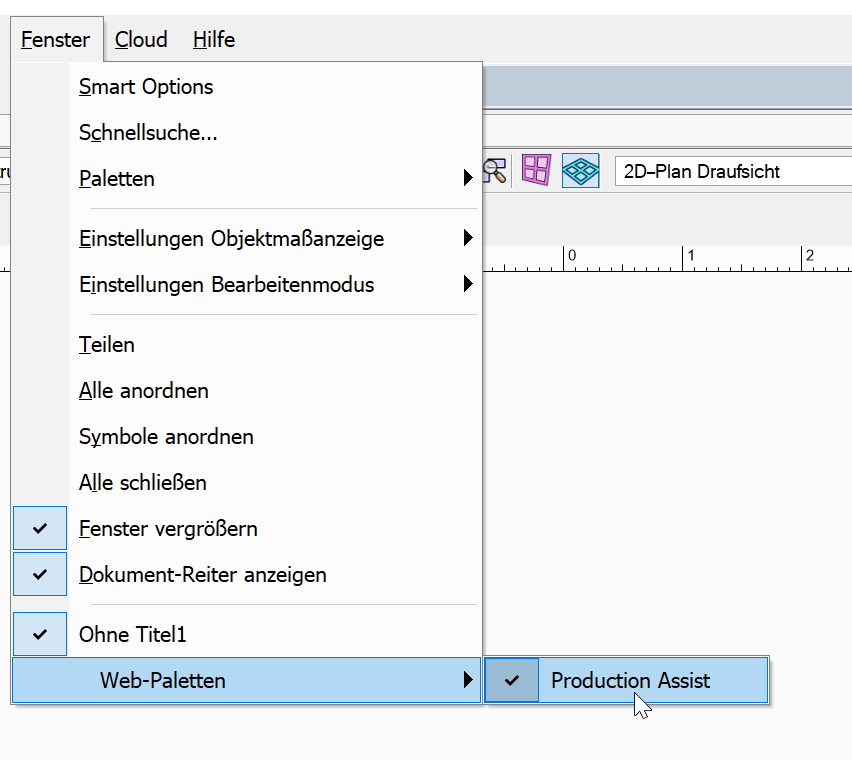
Start Vectorworks and open a new or existing drawing. After installing the Vectorworks plug-in, you can find the Production Assist Window under the menu item “Window”->“Web Palettes” in Vectorworks.
A window opens. If you are connected to the Internet the first time the windows opens, the Production Assist Login window appears. Enter your login details there to connect to the online server.
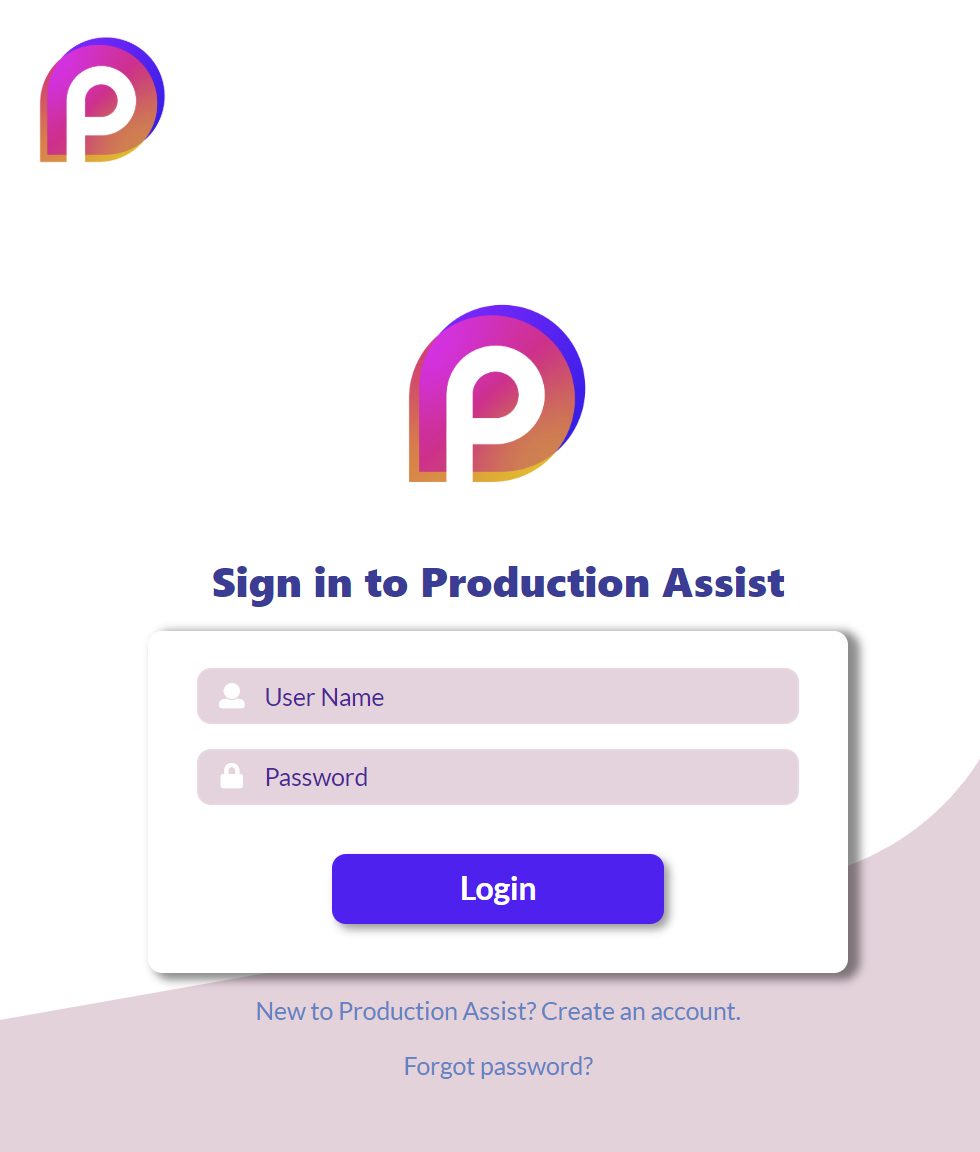
If you don't have an internet connection, no login window will appear, but the user interface will appear right away. As a result, however, you won't have access to Production Assist Library.
The Production Assist Window opens directly in worksheet view. To get to the general user interface, click the Edit tab in the top right corner.
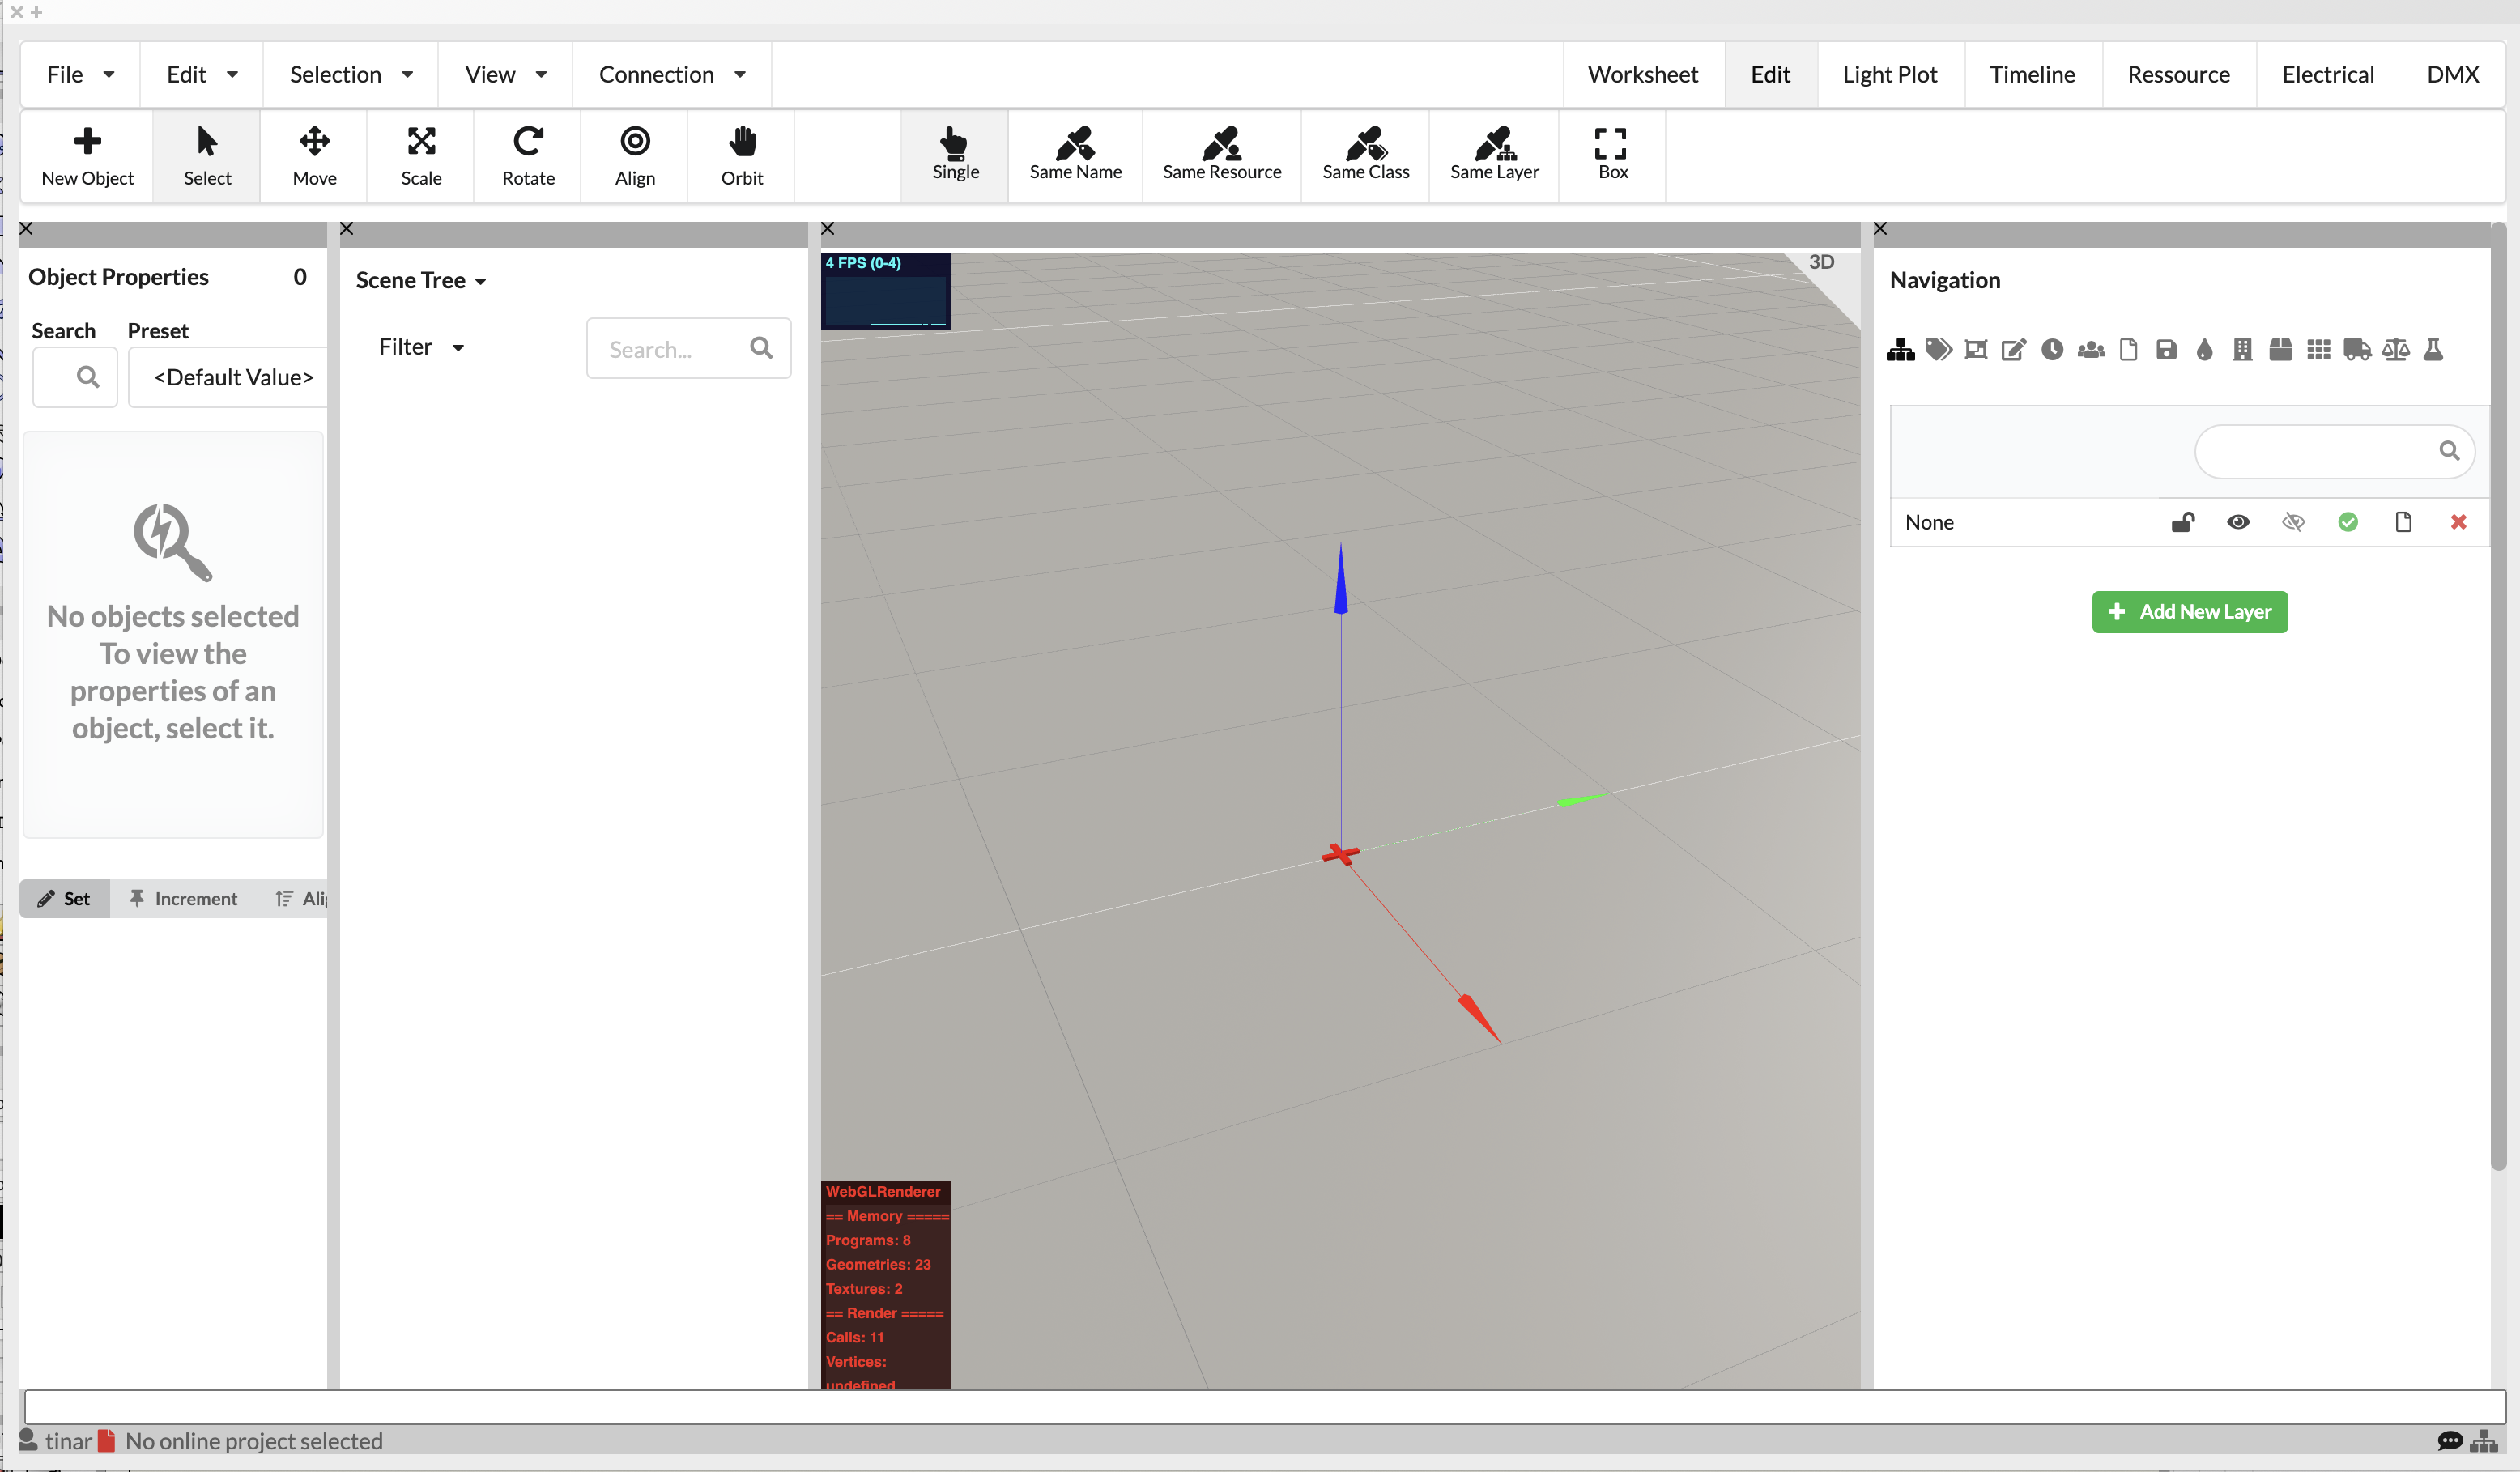
A brief overview of the different areas of the user interface and what can be found there is summarized in chapter User Interface .
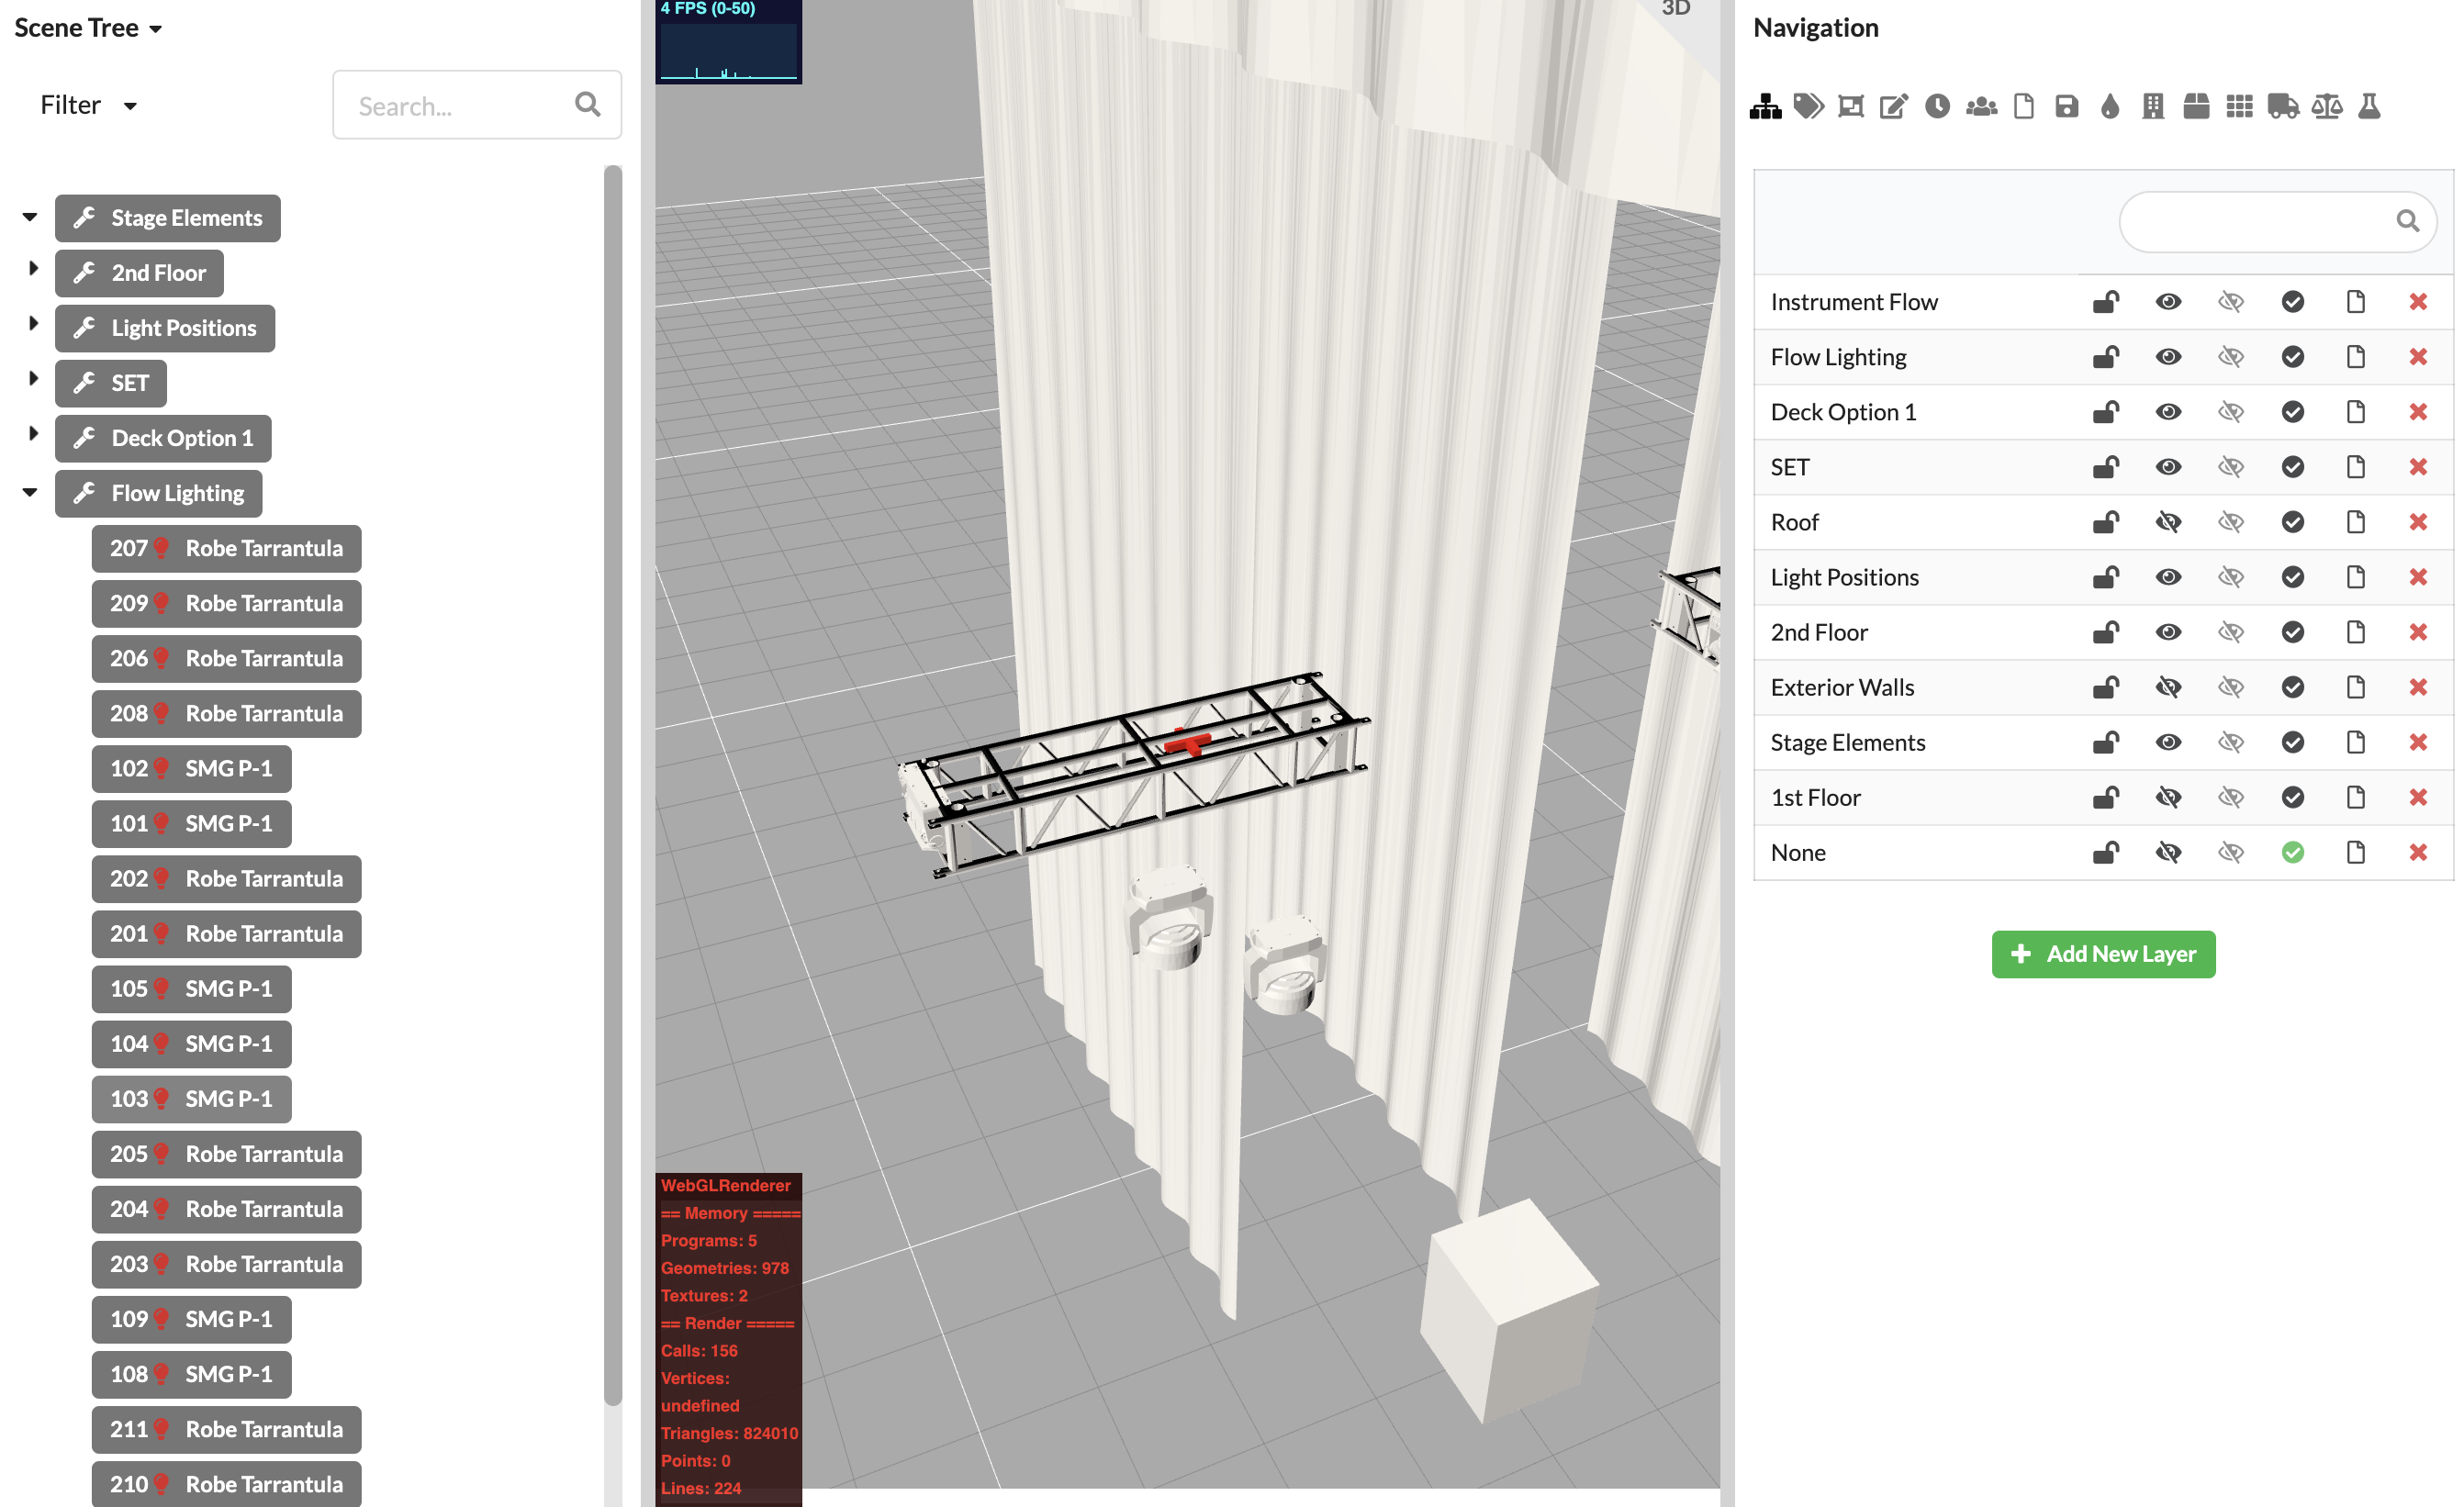
The Scene Tree shows all objects in your drawing and, if necessary, their association with each other, such as which objects are located in the same truss/light position. Currently, it is not possible to transfer structuring already made in drawings via MVR exchange. That's why you have to recreate them in order to be able to continue working productively with Production Assist. For this purpose, you create so-called Assembly Groups for related objects.
If you have already defined a good structure using layers or classes, it can be very helpful to group all objects in the Scene Tree first. To do this, click on Edit in the menu bar and then on Group by Class or Group by Layer.
Now you have already grouped objects that belong to the venue or set. If you now want to create individual trusses and their fixtures as an assembly (Assembly Group), you have several options:
With the SHIFT key held down, you can select multiple objects in a series, or by holding down the Cmd/Ctrl key, select multiple individual objects.
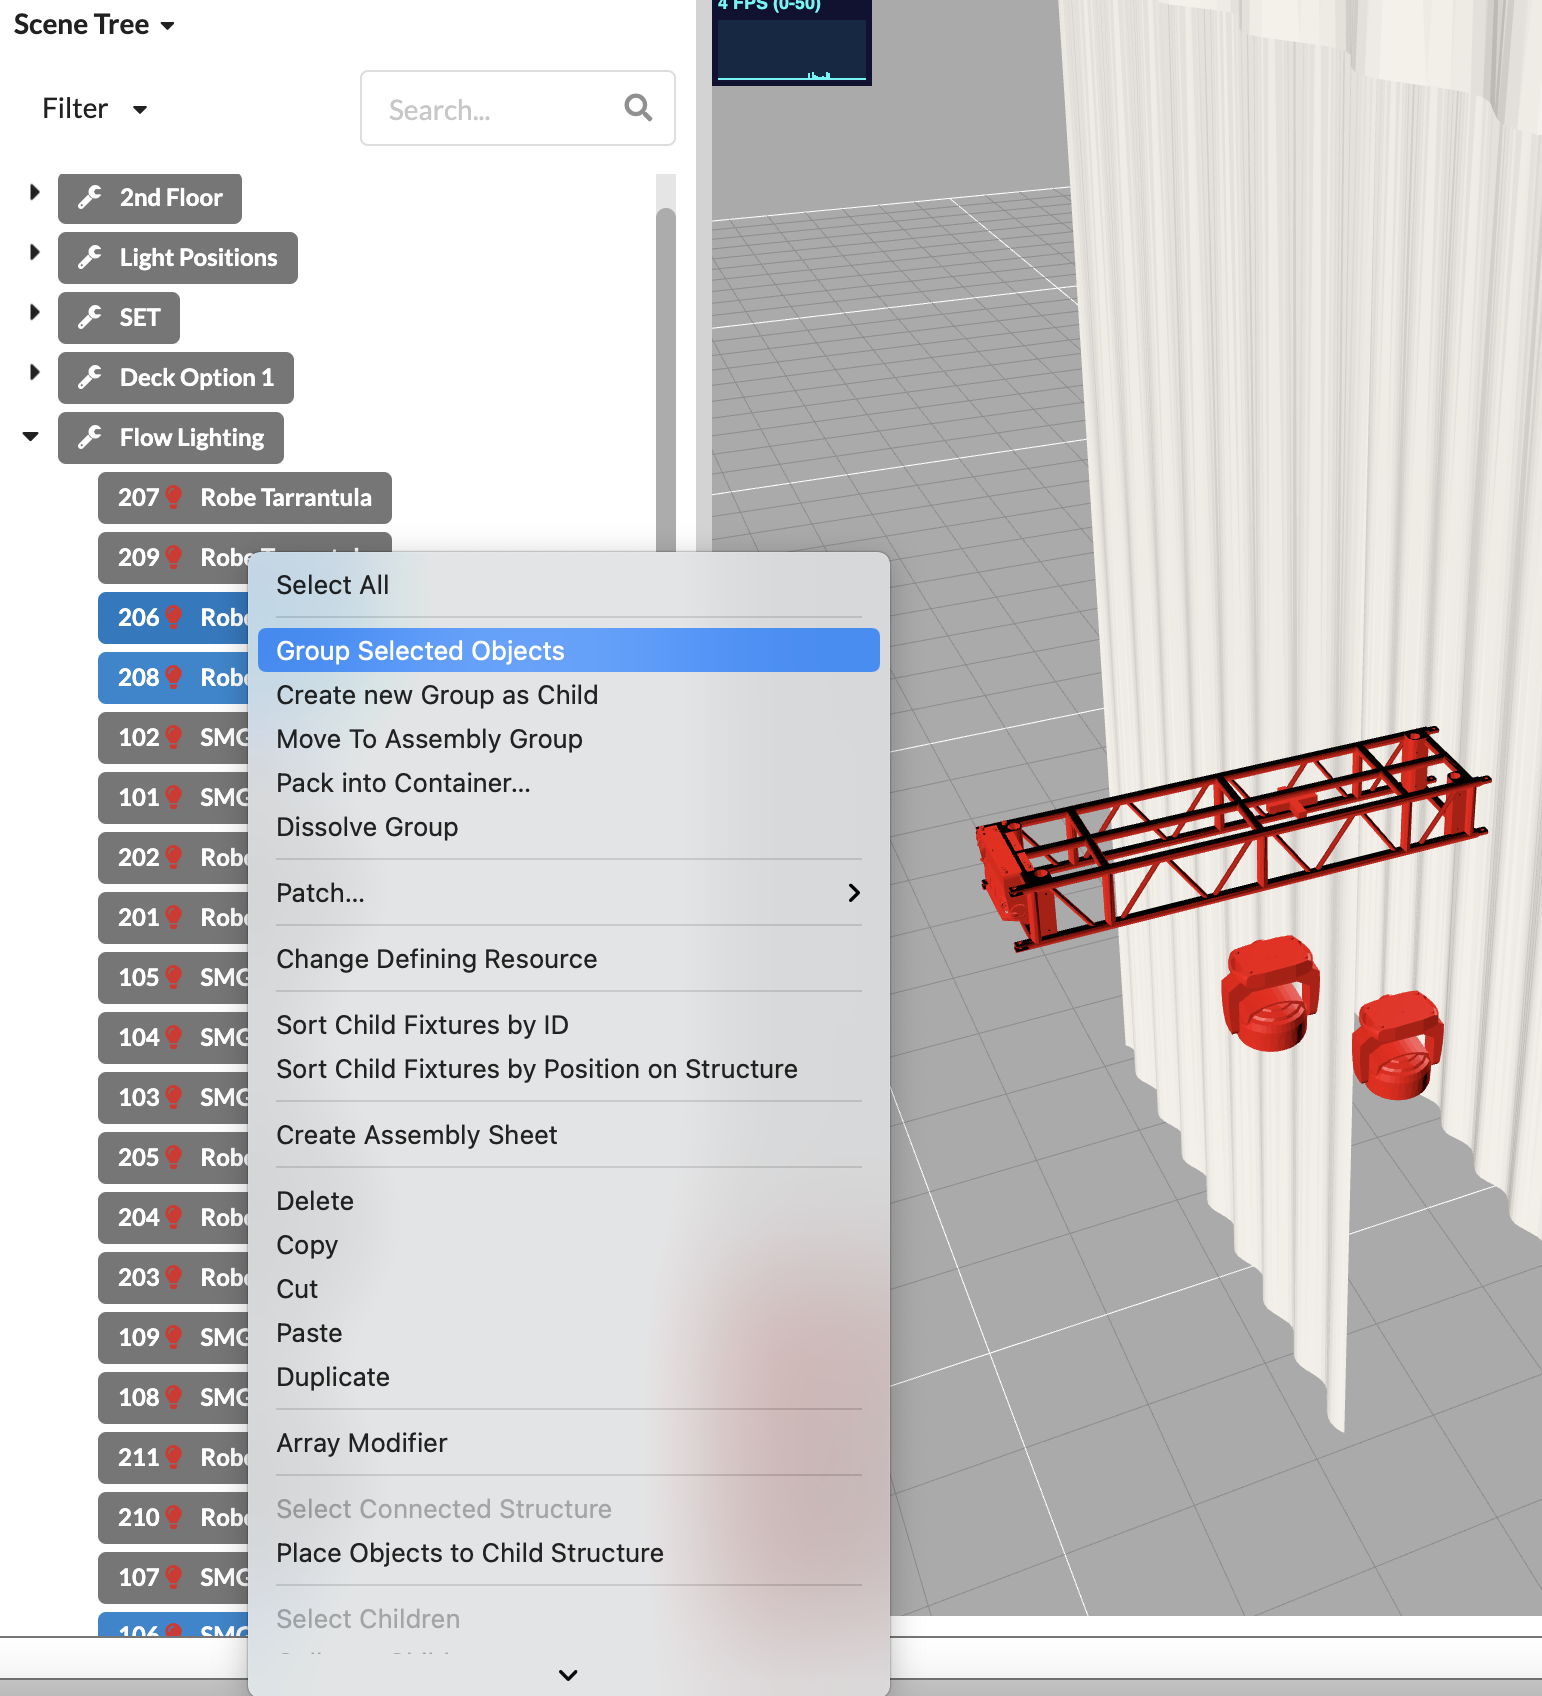
With the SHIFT key held down, you can select multiple objects in a series, or by holding down the Cmd/Ctrl key, select multiple individual objects. Or you can use the selection option Box in toolbar.
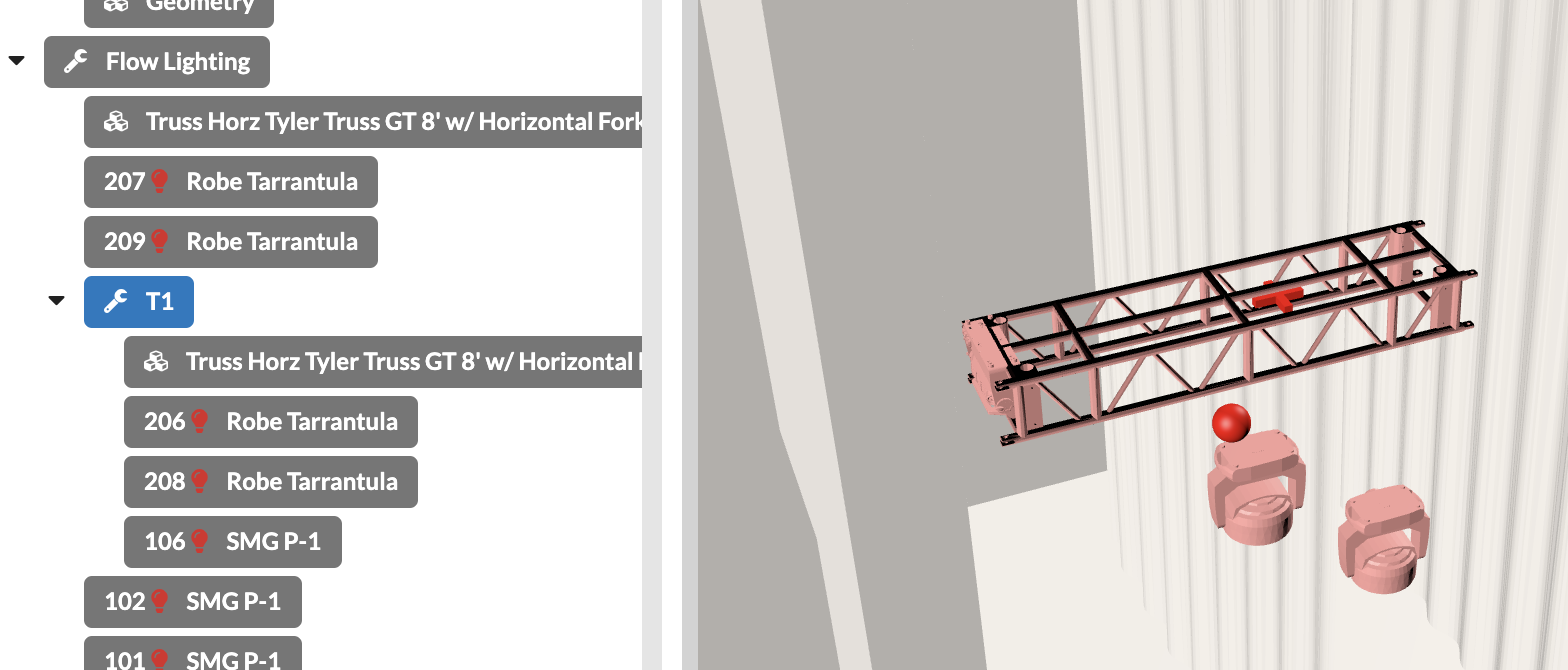
Now you can create a Assembly Group for all your assemblies/areas and drag and drop them in Scene Tree or drag forgotten objects into it.
When creating assembly groups, it can also be very helpful to use the filter in Scene Tree to display only certain types of objects. Or you can control the visibility of the objects via the layer and Classes in the Navigation.
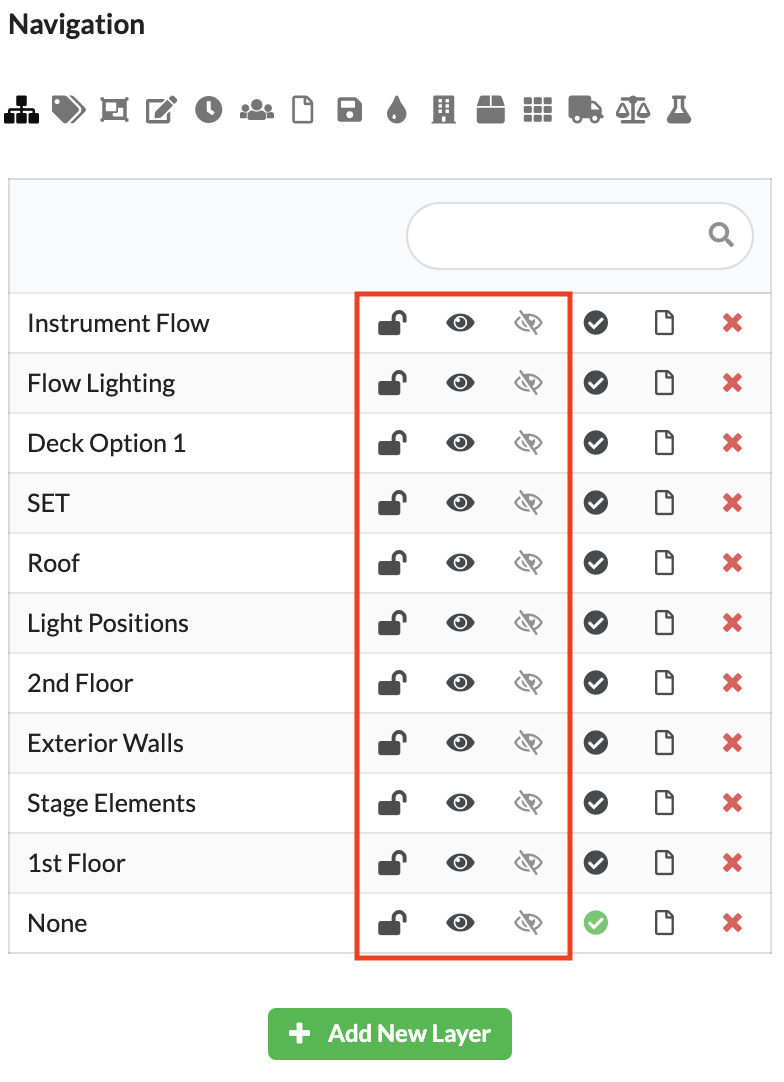
You can lock and unlock the level or class with the lock icon. Objects on locked levels or classes cannot be selected and therefore not edited. However, they are still visible in the Scene Tree and Renderer. The black eye icon controls whether objects on this layer/class are visible or invisible. Invisible objects cannot be selected and do not appear in the Scene tree or Renderer. If you activate the gray eye icon on one or more layers/classes, only objects that lie on that layer/class will be visible. All other objects become invisible regardless of their black eye setting.
Once you have structured your Scene Tree well, you can now link information contained in Vectorworks to Production Assist .
You can link the fields of intelligent Vectorwork symbols such as spotlights or trusses to fields in Production Assist . Most of them will be correctly linked automatically, but for example, you'll have to manually assign custom fields. To do this, click Resource in the menu bar and then on the tab VW Field Map.
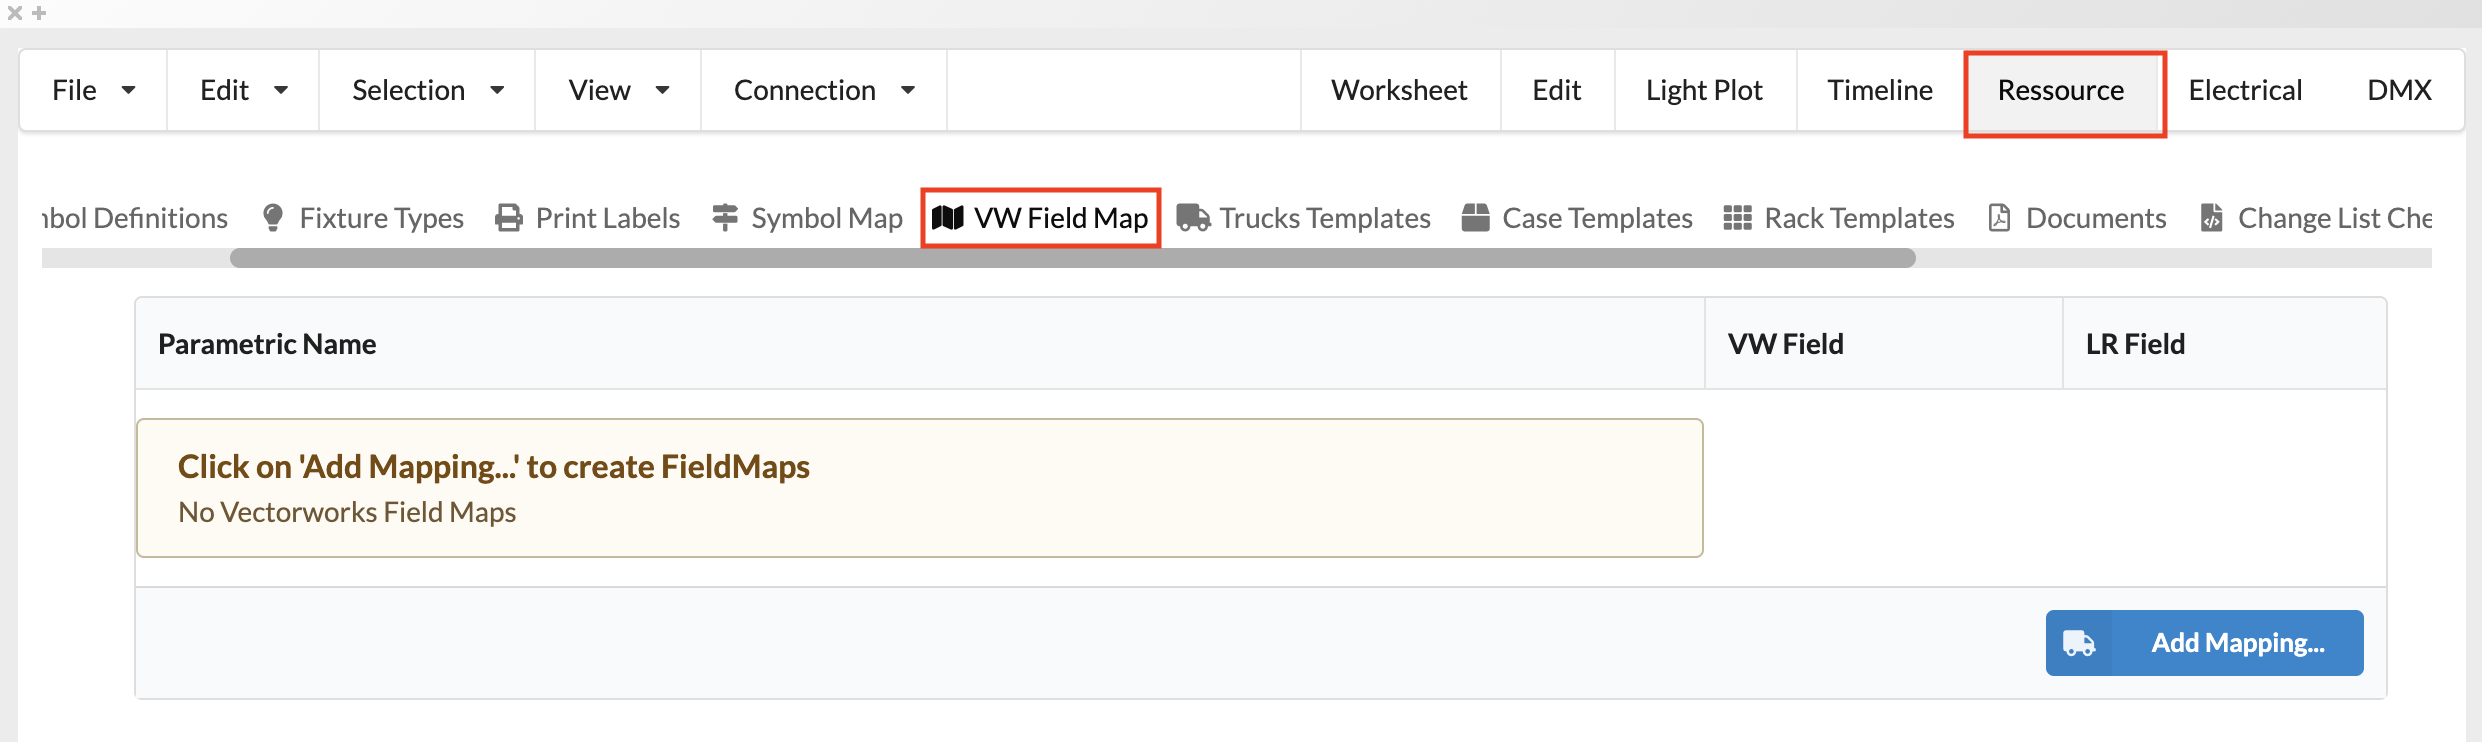
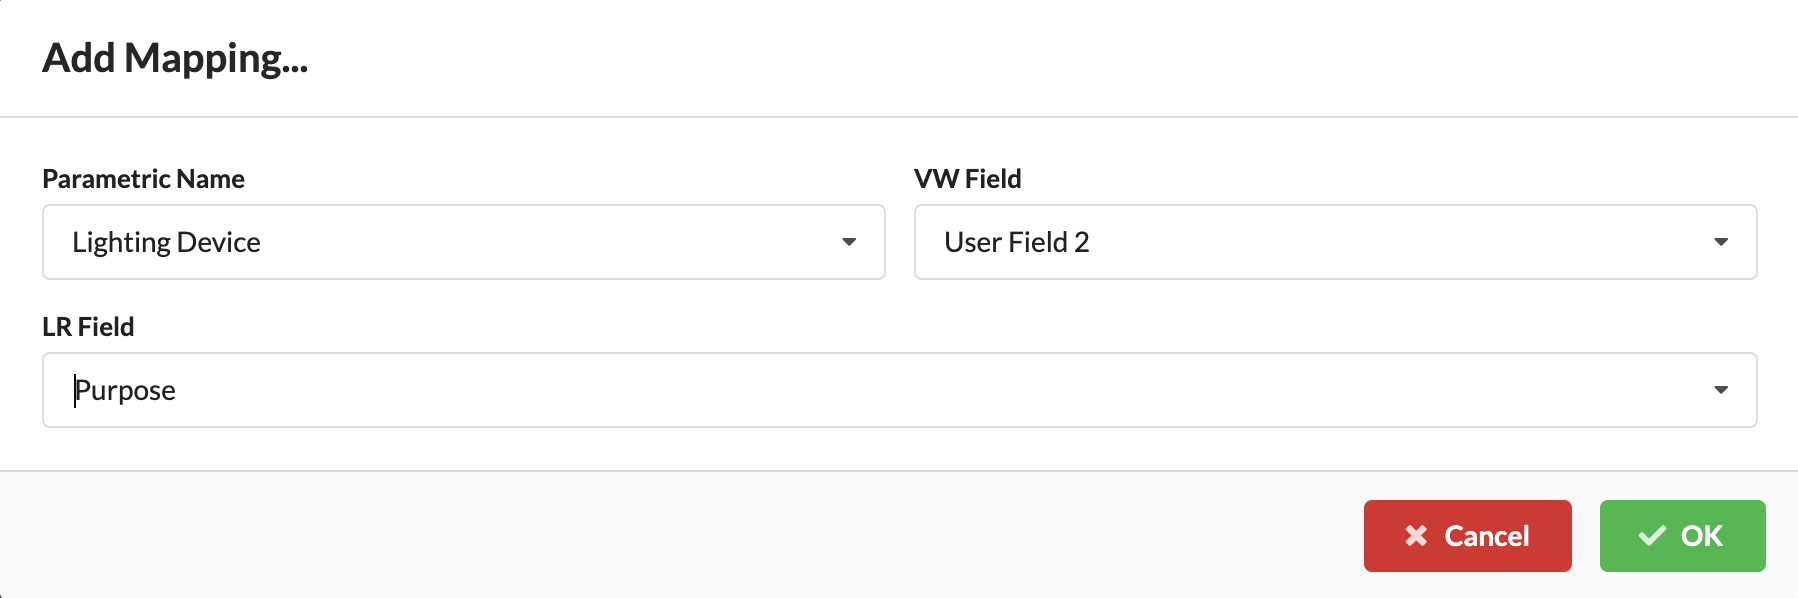
Click the blue Add Mapping button. A window opens in which you can select the object type (parametric name) and the desired Vectoworks field (VW Field), as well as the field in Production Assist it should be linked to (LR Field).
The fields are now linked. All changes in the Vectorworks plan are updated to Production Assist and the other way around. Once you've completed this preparation, you will now have various options to continue working.
Create power and network patch documentation
Create a static calculation for your ground support